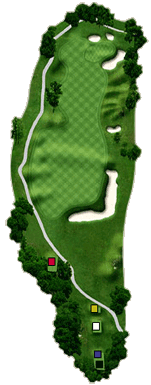
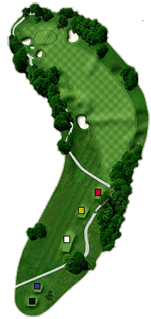
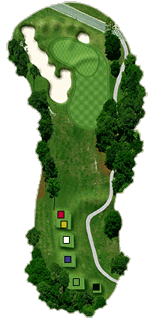
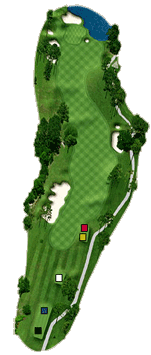
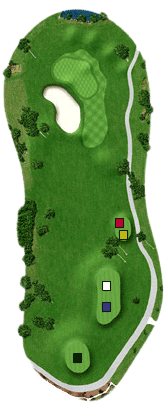
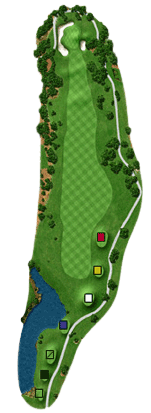
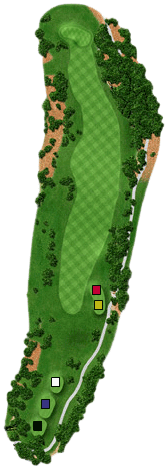
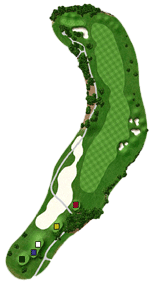
Golf

45 holes of championship golf designed by Pete Dye and Jack Nicklaus. Whether it's casual play or tournament play, golf is a major year-round activity at the Country Club of Landfall. 

A taste of what our golf program offers:

  • Men's and women's golf associations with one day a week tournament schedule

  • Several interclub matches

  • Growing young executive group with regularly scheduled "nine & dine" outings

  • Major Club Championships for men, women, couples, and juniors

  • Golf events planned by the Country Club of Landfall Golf Committee

  • Golf instruction for all skill levels

  • So much more 

From beginners to scratch golfers, we have tailored instructional programming to meet all of your golf game needs.

  • Private lessons

  • On-course lessons

  • Weekly clinics for different associations

  • Putting, short game, and full swing clinics

  • Weekly Ladies Beginner clinics

  • Corporate Clinics with video technique analysis

  • 20 golf tournaments a year for the competitive golfer

If your idea of a wonderful lifestyle includes playing outstanding courses in a beautiful setting 12 months a year, then the Country Club of Landfall is the place for you!

Click here for the Dye Course Scorecard

Click here for the Nicklaus Course Scorecard

Dye Course Tour


Dye Course Scorecard
(PDF)

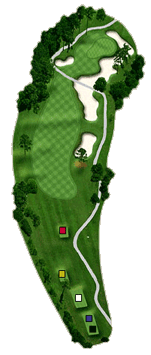
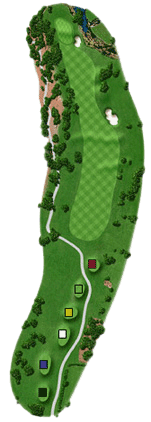
Hole # 1
Par 4


Tees Yardage
 
Black
378
 
Blue
351
 
White
317
 
Gold
282
 
Red
274
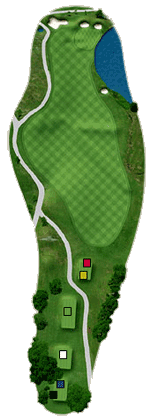
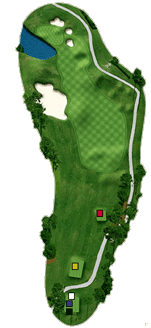
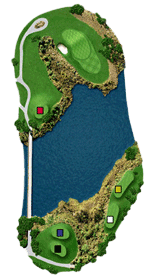
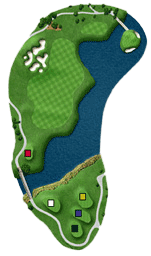
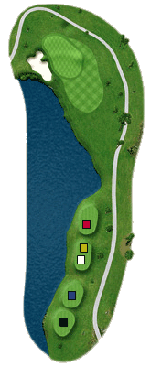
The Dye Course opens with this short par 4. Tee shots to the right center of the fairway are best. Big hitters do not need the driver as a long tee shot only brings the water on the right into play. An approach to the left center of the green usually leads to par. Dye Lake, the largest lake on the course, is filled with reclaimed water. By irrigating with reclaimed water, we are conserving fresh water resources.
Hole 1

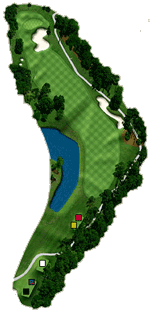
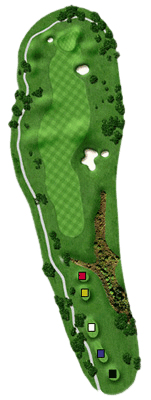
Hole # 2
Par 3


Tees Yardage
 
Black
135
 
Blue
122
 
White
111
 
Gold
103
 
Red
68
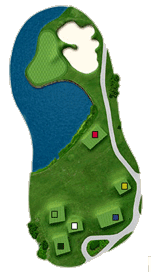
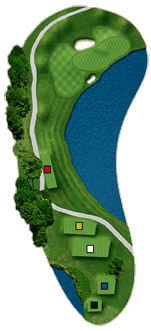
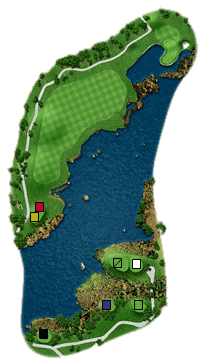
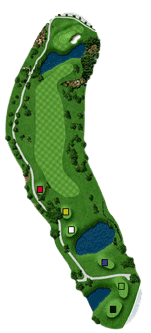
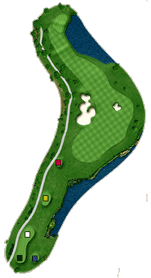
The short, treacherous par 3, whether playing downwind or into the wind, is equally challenging. The right front corner of the green is the best place for your tee shot, but shots to the left side are also well received. Many species of ducks can be seen on Dye Lake throughout the year including Hooded Mergansers, Ring-necked Ducks, American Wigeons, teals and Lesser Scaups.
Hole 1

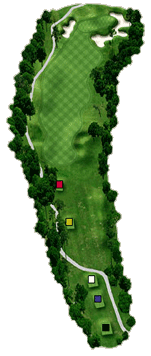
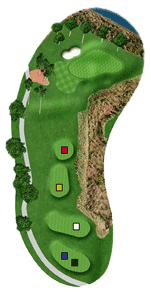
Hole # 3
Par 4


Tees Yardage
 
Black
467
 
Blue
425
 
White
395
 
Gold
340
 
Red
273
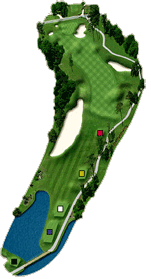
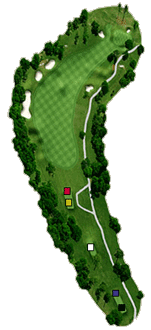
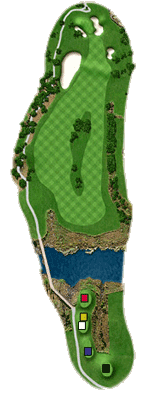
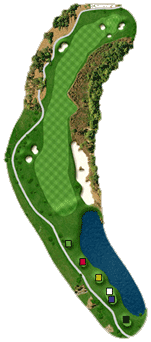
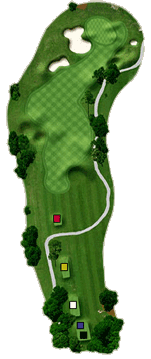
On this long par 4, a draw off the tee will get more roll. Going too far right makes the hole longer than necessary. "Hanging" lies are common for the second shot. Take enough club on the slightly uphill approach and avoid the right bunker.
Hole 3

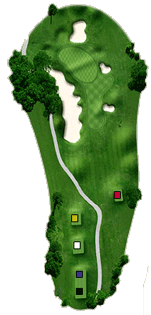
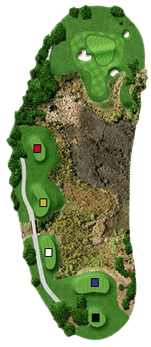
Hole # 4
Par 5


Tees Yardage
 
Black
521
 
Blue
507
 
White
496
 
Gold
475
 
Red
400
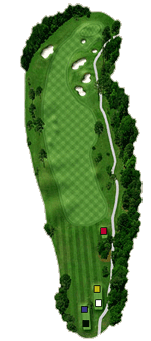
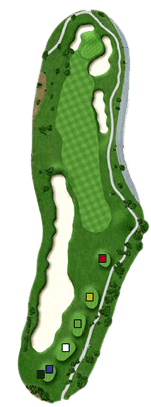
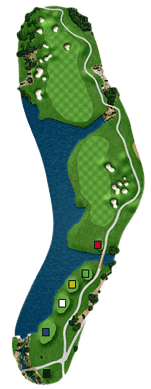
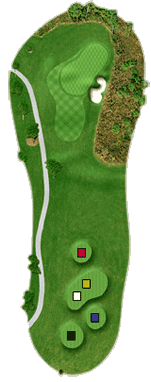
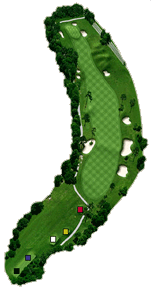
The reachable par 5 requires a tee shot down the right side of the fairway as the mounding on the left will stop a rolling drive. If you lay-up, stick to the left side. Avoid the pot bunker fronting the two-tiered green. If the flagstick is back, a bump and run shot works great. The mixed hardwood forest to the left of the green is part of the community conservation area and provides habitat for a diversity of wildlife.
Hole 4

Hole # 5
Par 4


Tees Yardage
 
Black
401
 
Blue
386
 
White
361
 
Gold
334
 
Red
280
The dogleg right requires a left to right tee shot. The fairway bunkers on the right side are more in play than they appear to be from the tee. Play the approach shot slightly left of center to avoid the bunker on the right. The green slopes from back to front. The conservation area continues along this hole's left side. Deer, fox and rabbits are commonly seen in the area.
Hole 5

Hole # 6
Par 5


Tees Yardage
 
Black
533
 
Blue
515
 
White
485
 
Gold
412
 
Red
405
A drive down the right center of the fairway is best on this par 5. Long hitters can cut the corner and reach in two, but most players lay up their second shots with a mid-iron. Keep approach shots under the hole as this green slopes from back to front. Hooded Mergansers and other waterfowl can often be seen in the drainage pond on the left side of this fairway.
Hole 6

Hole # 7
Par 4


Tees Yardage
 
Black
433
 
Blue
399
 
White
377
 
Gold
309
 
Red
262
Keep your tee shot left of center on this par 4. The hole plays uphill and, especially into the wind, longer than the yardage. The downhill approach is to a green that slopes away from you, making stopping the ball very tough. If you go long, you'll face a very difficult pitch.
Hole 7

Hole # 8
Par 3


Tees Yardage
 
Black
209
 
Blue
193
 
White
165
 
Gold
139
 
Red
123
The green on this par 3 has a very small landing area. The front right corner is the preferred spot unless the pin is back. The tees aim you to the right, so be sure you're aligned correctly. A shot hit short and right of the green is actually a good play. The birdbox to the right of the tees provides a home for Eastern Bluebirds and other cavity-nesting birds. Twenty-one nesting boxes have been placed throughout the course.
Hole 8

Hole # 9
Par 4


Tees Yardage
 
Black
431
 
Blue
421
 
White
386
 
Gold
367
 
Red
323
This par 4 has a two-tiered fairway. Shots lost to the right leave a very difficult second shot to the elevated green. A good tee shot leaves a mid- to long-iron approach. If the wind is with you, the approach is shorter. Getting close to a back right pin can be treacherous. One of two populations of fox squirrels can often be seen on this hole. Look for the other one on the driving range as you make the turn.
Hole 9

Hole # 10
Par 4


Tees Yardage
 
Black
388
 
Blue
380
 
White
360
 
Gold
320
 
Red
260
The fairway on this short par 4 slopes from right to left toward the bunker. The two-tiered green is very wide, but be careful when the pin is back as any approach hit long means bogey or worse.
Hole 10

Hole # 11
Par 4


Tees Yardage
 
Black
405
 
Blue
389
 
White
330
 
Gold
292
 
Red
268
Prepare for the Dye Course's most difficult tee shot. A fairway wood or a long iron should help you avoid the left side and find the small landing area. The two-tiered green has a slight false front. Approach shots play shorter than the yardage, but if you come up short and right, a very difficult pitch awaits.
Hole 11

Hole # 12
Par 5


Tees Yardage
 
Black
566
 
Blue
548
 
White
488
 
Gold
465
 
Red
420
On this challenging dogleg left par 5, tee shots right of center are best. Then you must choose; lay up short of the bunkers for a 100-yard approach shot or try to carry the bunkers and reach in two.
Hole 12

Hole # 13
Par 3


Tees Yardage
 
Black
206
 
Blue
183
 
White
166
 
Gold
153
 
Red
143
What you see is what you get on this par 3. Play to the right center of the green regardless of the pin position. Getting up and down from the left bunker can be very difficult, so try to make birdie on another hole and safely get your par here. There is a large population of woodpeckers throughout the course and they are particularly fond of this hole. The large conservation area adjacent to the course protects the longleaf pine forest, a vital habitat for the endangered Red-Cockaded Woodpecker.
Hole 13

Hole # 14
Par 4


Tees Yardage
 
Black
476
 
Blue
437
 
White
390
 
Gold
330
 
Red
320
On this long par 4, tee shots to the right center of the fairway that avoid the bunker work best. If the pin is on the front of this large green, a high approach shot is required as bump and run shots are not well received. The water on the right should not be a concern.
Hole 14

Hole # 15
Par 4


Tees Yardage
 
Black
339
 
Blue
325
 
White
292
 
Gold
287
 
Red
233
Driver is fine on this short par 4, but not necessary. Big hitters can reach the water on the left. A solid tee shot will leave a pitching or sand wedge approach. Any ball that lands on the back-to-front sloping green with a lot of spin will draw back quite a distance. The emergent plants and grasses at the edge of the pond to the left of this green provide a buffer from fertilizer and pesticide run-off as well as valuable habitat for waterfowl, wading birds and amphibians.
Hole 15

Hole # 16
Par 3


Tees Yardage
 
Black
196
 
Blue
175
 
White
156
 
Gold
143
 
Red
104
This par 3 is the most challenging hole on the course. It requires a very precise tee shot to a three-tiered green. Any shot that goes over the green into the back bunker leaves a difficult downhill pitch back toward the water. No-spray zones have been established around all bodies of water at Landfall.
Hole 16

Hole # 17
Par 4


Tees Yardage
 
Black
460
 
Blue
446
 
White
385
 
Gold
327
 
Red
314
You can shorten this long dogleg right by playing to the right side, but the lie could be awkward. Lies are best left of the fairway's center. The downhill approach plays slightly shorter than the yardage, but if you come up short, a difficult pitch remains. Chipping from left of the green is also challenging.
Hole 17

Hole # 18
Par 5


Tees Yardage
 
Black
505
 
Blue
489
 
White
460
 
Gold
449
 
Red
398
To get on in two, long hitters must reach the top fairway tier on this uphill par 5. Pin position on the enormous green determines the hole's length. Second shots feed toward the right side bunker. Lay up to the 100-yard marker. The green slopes from left to right except in the back left corner.
Hole 18

Marsh Course Tour

Hole # 1
Par 4


Tees Yardage
 
Black
377
 
Blue
353
 
White
325
 
Gold
295
 
Red
256
To get on in two, long hitters must reach the top fairway tier on this uphill par 4. Pin position on the enormous green determines the hole's length. Second shots feed toward the right side bunker. Lay up to the 100-yard marker. The green slopes from left to right except in the back left corner. Notice the bluebird nesting box to the right of the black tee. There are 41 nesting boxes throughout the course. They provide homes for bluebirds and other small birds.
Hole 1

Hole # 2
Par 3


Tees Yardage
 
Black
199
 
Blue
170
 
White
157
 
Gold
123
 
Red
114
The double-tiered green on this par 3 is well bunkered on the left. Play to the right of the pin on all shots. This hole is also very exposed to the wind and plays very long if the wind is in your face. If you miss, miss to the right. The tall grasses, emergent plants and shrubs around the pond behind the green provide buffer from runoff.
Hole 1

Hole # 3
Par 4


Tees Yardage
 
Black
471
 
Blue
415
 
White
379
 
Gold
344
 
Red
306
This tee shot landing area is very generous. The hole plays to the yardage even though the second shot is downhill. The well-bunkered and undulated green requires the most accurate second shot on the course. The safe play is to land short and run the ball to the center of the green. The pond to the left of the trees is home to mallards and other waterfowl. Howe's Creek can be seen behind the green.
Hole 3

Hole # 4
Par 4


Tees Yardage
 
Black
425
 
Blue
410
 
White
390
 
Gold
305
 
Red
297
This slight dogleg left features an uphill tee shot. The approach shot is closely framed by oak and pine trees. Avoid flying the green; chipping back is a challenge. A left second shot or an approach high enough to avoid the tree guarding the green. The forested wetland behind the trees provides habitat for a diversity of wildlife. The nesting box just past the cooler is home to bluebirds.
Hole 4

Hole # 5
Par 5


Tees Yardage
 
Black
535
 
Blue
514
 
White
498
 
Gold
463
 
Red
422
On this dogleg left par 5, the front-to-back sloping green, hidden to the left is guarded by a large pine tree and bunker front left. Long hitters can reach in two, but the second shot must have a high enough trajectory. Smart players will lay up the second shot right of the green and play a pitch to the hole. Notice the nest box to the left of the cart path at the 100-yard marker. Most of the nest boxes activly fledge young every year.
Hole 5

Hole # 6
Par 3


Tees Yardage
 
Black
191
 
Blue
175
 
White
165
 
Gold
145
 
Red
90
Trees and marsh surround this two-tierd green. Take an extra club when the pin is back. The marsh is very close to the green's left side. The only bail out is right, but there is another hazard even further to the right. The wetlands in front of the trees and green provide breeding, nesting and feeding grounds for a diversity of wildlife.
Hole 6

Hole # 7
Par 4


Tees Yardage
 
Black
414
 
Blue
387
 
White
348
 
Gold
289
 
Red
275
This hole requires an accurate tee shot and second shot of absolute precision. If the pin is in front, a short-iron approach can be testy. If the wind is in your face, take an extra club. If you aren't sure, play to the back of the green and take your chances chipping. The grove of trees between the black and blue tees is a common nesting site for osprey.
Hole 7

Hole # 8
Par 5


Tees Yardage
 
Black
507
 
Blue
483
 
White
463
 
Gold
451
 
Red
429
Trees split the fairway of this reachable par 5. Staying left from the tee is safer. Play your second shot to the well-guarded green or just short of it. A tee shot to the right fairway is riskier, but you'll face a straighter approach. Bunker shots from around the green aren't that difficult because all pin positions are accessible. The wetlands in front of the trees are home to swan, egrats and red-winged blackbirds.
Hole 8

Hole # 9
Par 4


Tees Yardage
 
Black
431
 
Blue
409
 
White
383
 
Gold
356
 
Red
285
This par 4 is one of the club's finest. The tee shot is tailor made for a slight fade. Avoid the waste area guarding the out of bounds on the left. The second shot is played over the marsh to a wide green protected by water hazard on three sides: front, left and beyond. The natural vegetation of the wetland surrounding most of the green provides a natural buffer for the pond.
Hole 9

Ocean Course Tour

Hole # 1
Par 5


Tees Yardage
 
Black
537
 
Blue
527
 
White
486
 
Gold
460
 
Red
402
The tee shot on this tough par 5 must avoid water left and pot bunkers right. With the wind, long hitters can reach the crossing water hazard. Lay-up second shots short of the pot bunker on the right. The slightly uphill approach plays longer than the yardage. The back-to-front sloping green is well bunkered. The large lake is home to a diversity of waterfowl including swans, Canada geese and mallards.
Hole 1

Hole # 2
Par 4


Tees Yardage
 
Black
444
 
Blue
419
 
White
387
 
Gold
363
 
Red
309
A draw from the tee is perfect on this slight dogleg left. The bunker on the right of the fairway is your target. The narrow, two-tiered green requires a very accurate approach. Shots that come up short will bounce toward the green. The tall grasses and shrubs bordering the pond behind the green provide natural filters for chemical drift and run-off.
Hole 1

Hole # 3
Par 4


Tees Yardage
 
Black
436
 
Blue
406
 
White
381
 
Gold
348
 
Red
330
This hole turns slightly to the right. A left center tee shot that avoids the fairway bunker on the right is best. The downhill second shot plays slightly shorter than the yardage. An approach to the left front section of the green will leave you with a tricky putt. A natural wetland lines the beginning of the fairway.
Hole 3

Hole # 4
Par 3


Tees Yardage
 
Black
148
 
Blue
148
 
White
125
 
Gold
99
 
Red
77
This short, but challenging par 3 is the most picturesque hole on the course. The putting surface slopes away from the back left bunker, making bunker shots an adventure. Take an extra club to a back right pin position. Be aware of the wind as it swirls in off the ocean. A captivating view of the Atlantic Intracoastal Waterway makes this hole stand out. The ravine along the right side has been planted with grasses and cherry trees.
Hole 4

Hole # 5
Par 4


Tees Yardage
 
Black
412
 
Blue
358
 
White
330
 
Gold
271
 
Red
260
This intimidating tee shot requires a forced carry over the marsh. Play your drive to the left center of the fairway to avoid the hidden hazard on the right. This green has a large slope on the left side. Approaches to a back left pin must carry the full distance to remain near the cup. The natural wetland dominating the beginning of the hole provides breeding, nesting and feeding grounds for a diversity of wildlife. Red-tailed Hawks commonly nest in the trees behind the green.
Hole 5

Hole # 6
Par 3


Tees Yardage
 
Black
229
 
Blue
209
 
White
188
 
Gold
147
 
Red
111
The forced carry tee shot on this par 3 is uphill. The bunker on the left is deep, but you have some room to work with. Downhill putts on this back-to-front sloping green are very tough, so shoot for the middle of the putting surface. Par is a fine score. The large wetland that dominates the hole provides a natural buffer to the waterway. Many species of birds can be seen in the area.
Hole 6

Hole # 7
Par 5


Tees Yardage
 
Black
480
 
Blue
480
 
White
461
 
Gold
439
 
Red
365
A straight tee shot is required on this short par 5. Water along the right side crosses in front of the green. Aim your drive at the bunker on the left. A 215-yard approach remains. Stay left and lay up with a mid-iron or play to the opposite fairway. Birdies should be common here. A multi-level creek flows from the green to the tees, providing habitat for turtles and waterfowl.
Hole 7

Hole # 8
Par 4


Tees Yardage
 
Black
342
 
Blue
319
 
White
310
 
Gold
298
 
Red
252
This great hole has a true island green. Go with a long iron or fairway wood from the tee, avoiding the bunkers on the left. A tee shot just over the hill will put you about 110 yards out. A short-iron approach must be accurate for a sinkable putt as this green is severely undulated. The large irrigation lake provides habitat for mallards, swans, Canada geese, blue herons, egrets, turtles and schools of fish.
Hole 8

Hole # 9
Par 4


Tees Yardage
 
Black
445
 
Blue
416
 
White
356
 
Gold
329
 
Red
296
Play a left to right tee shot from the back tees on this dogleg right. The front tee markers require a straight tee ball. Warning: the water fronting the green can be reached from the three front tee markers, but is too far out to be of concern from the back tees. The natural grass area at the end of the fairway provides habitat for many small birds including Killdeer.
Hole 9

Pines Course Tour

Hole # 1
Par 4


Tees Yardage
 
Black
465
 
Blue
424
 
White
414
 
Gold
368
 
Red
323
This long, straight par 4 typically plays into the wind. Avoid the bunker on the right from the tee by staying left of the fairway's center. The green, sitting in a hollow, is an easy target. You can run second shots up if necessary. The bowl-shaped green feeds to the middle, with some left to right slope. Native longleaf and loblolly pines dominate this course. Pine forests provide homes for a wide diversity of wildlife. Notice the two nesting boxes near the tees.
Hole 1

Hole # 2
Par 4


Tees Yardage
 
Black
540
 
Blue
507
 
White
497
 
Gold
476
 
Red
449
A left-to-right tee shot is required on this par 5. Aim second shots right of the left side bunker. Long hitters can reach in two, but must carry the hazard. Only a lofted shot will hold the small, elevated, front-to-back sloping green. Chipping from off the putting surface is a challenge. The pine forest along the left side of this hole is home to a large population of fox squirrel.
Hole 1

Hole # 3
Par 5


Tees Yardage
 
Black
163
 
Blue
163
 
White
150
 
Gold
135
 
Red
115
The green on this short, deceptive par 3 slopes away from you. Play beyond a front pin location to avoid the green's false front. Back right hole locations are especially tricky. The green narrows in the middle, but widens in back. Birdie attempts are possible from the middle of the green. The pond to the right of the tees is home to frogs, turtles and other wildlife. The land surrounding the lake is a naturalized grass area that is not mowed regularly.
Hole 3

Hole # 4
Par 4


Tees Yardage
 
Black
349
 
Blue
318
 
White
312
 
Gold
301
 
Red
239
On this short par 4, lay-up your tee shot short of the bunker on the right or hit driver over the bunker and be left with a pitching wedge. The fairway slopes from left to right and widens behind the fairway bunker. It is difficult to recover if you miss this slightly elevated green. The mixed hardwood forest is home to deer, fox, many species of birds and other wildlife.
Hole 4

Hole # 5
Par 4


Tees Yardage
 
Black
429
 
Blue
400
 
White
384
 
Gold
338
 
Red
300
Play your tee shot to the left of the tree in the middle of the fairway on this par 4. Long hitters can reach the water on the right. The slightly downhill approach plays slightly shorter than the posted yardage. Play to the center of the green. Birdies are possible on this hole. No-spray zones and buffers have been established around all bodies of water.
Hole 5

Hole # 6
Par 3


Tees Yardage
 
Black
203
 
Blue
187
 
White
163
 
Gold
155
 
Red
134
This green on this spectacular par 3 is fronted by the lake and framed by pine trees. There is plenty of bailout room on the right for those who want to avoid the water and the bunker on the left. Take an extra club if the prevailing wind is in your face. Blue heron, egret and crane are commonly seen along this lake bank.
Hole 6

Hole # 7
Par 4


Tees Yardage
 
Black
357
 
Blue
357
 
White
335
 
Gold
309
 
Red
231
The tee shot on this short par 4 is very straightforward. Be sure to take enough club on the approach; the pot bunker fronting the green must be avoided. The severely-undulated green is split by a large slope. Shots left of the slope feed farther left. Putting can be extremely difficult. A group of otters can often be seen playing in the lake next to the tees. The knoll to the right of the green is the highest elevation on the course.
Hole 7

Hole # 8
Par 5


Tees Yardage
 
Black
513
 
Blue
511
 
White
486
 
Gold
400
 
Red
396
This short par 5 is reachable in two. A tee shot to the right side that avoids the bunker will run down the slope. Long hitters can reach the bunkers that cross the fairway, especially with the wind. This shallow green is not receptive to shots from the left, so lay up second shots to the right. The naturalized grass area to the left of the tees is home to a large population of rabbits.
Hole 8

Hole # 9
Par 4


Tees Yardage
 
Black
433
 
Blue
413
 
White
388
 
Gold
336
 
Red
277
Aim your drive between the bunkers. Long hitters can carry the left side bunker to a spot about 120 yards out. The front and right sides of this shallow green are guarded by water. Only a lofted approach will hold. Take an extra club to right side pins. Miss long rather than short. The large irrigation lake along the right side provides reclaimed water for irrigation, helping to conserve the potable water resource.
Hole 9